Bees & Bombs
Rebuilding a gif from Bees & Bombs
Tutorials>Slack Logo
Slack Animation Example
In this tutorial, we’re going to recreate the Slack loading animation.

This is the second in a series of loading animation tutorials. In the last installment, we covered the Skype loading animation. This example has some similarities but is a little more complex. So no slacking, let’s get started.
If you haven’t already done so, install C4 by following the instructions on our install tutorial. The easiest is to use the first option.
The SlackLine
The slack logo is made up of 4 lines that animate in all kinds of funky ways: rotations, movements, translations, overlays, etc. But, despite the seeming complexity, there really is just 1 element. So, we’re going to build a class that represents the look and motion of a single line.
Create a new C4 Project
Then…
Create a new file called SlackLine.swift
Make a subclass of View by adding this code:
1
2
3
class SlackLine: View {

}
Properties
Add the following two properties as class variables:
1
2
3
4
5
6
var line: Line!
var strokeColor: Color = C4Blue {
    didSet {
        line.strokeColor = strokeColor
    }
}
Straightforward, each line needs a Line and a color.
Initialization
We need to create a line, position and style it properly.
1
2
3
4
5
6
7
8
9
10
11
12
13
14
15
16
17
18
19
20
21
22
override init() {
    super.init()
    self.frame = Rect(0,0,106,18.0)
    line = Line(Point(height/2.0,height/2.0),Point(width-height/2.0,height/2.0))
    line.lineWidth = height
    add(line)

    square.corner = Size()
    square.lineWidth = 0
    square.hidden = true
    add(square)

    squareMask.lineWidth = height
    square.mask = squareMask

    var anchor = square.center
    anchor.x += height * 0.26
    anchor.x /= width
    anchor.y = 0.5
    squareMask.anchorPoint = anchor

}
animate()
The timing of the Slack logo animation is a tricky one to pull apart. We spent a lot of time with our noses pressed up against our screens trying to figure out all the different steps (we even recorded the animation and stepped through it one frame at a time).
This is our initial breakdown of the steps in the animation:
- The line’s stroke animates to a point.
- The line begins to rotate.
- As the line is rotating the point moves from one end of the line to the other.
- When the rotation ends the line animates from a point, back to a full line shape (in the opposite direction of step 1.).
- The line bounces a little bit before coming to a stop.
This took a long time to figure out… There was a lot of iteration over the steps of the animation (in code) before finally feeling like we nailed the process.
The following function is a basic version of the 5-step animation, add it to your class:
1
2
3
4
5
6
7
8
9
10
11
12
13
14
15
16
17
18
19
20
21
22
23
24
25
26
27
28
29
30
func animate() {
    let strokeOut = ViewAnimation(duration: 0.25) {
        self.line.strokeEnd = 0.01
    }
    strokeOut.curve = .EaseOut
    strokeOut.delay = 0.1

    let shiftStroke = ViewAnimation(duration: 0.25) {
        self.line.strokeStart = 0.99
        self.line.strokeEnd = 1.0
    }
    shiftStroke.delay = 0.35
    shiftStroke.curve = .EaseIn

    let strokeIn = ViewAnimation(duration: 0.15) {
        self.line.lineWidth -= 1
        self.line.strokeStart = 0.05
        self.line.transform.scale(1/1.05, 1.0)
    }
    strokeIn.delay = 0.2

    let bounceOut = ViewAnimation(duration: 0.15) {
        self.line.transform.scale(1.05, 1.0)
        self.line.lineWidth += 1
        self.line.strokeStart = 0.0
    }

    let seq = ViewAnimationSequence(animations: [strokeOut, shiftStroke, strokeIn, bounceOut])
    seq.animate()
}
Here are a couple things to take note of:
- Assigning
strokeEndto0.01and0.99preserves the circle / dot / point shape. - In
shiftStrokeanimating both the start and end points makes it look like the dot is actually moving from one end of the line to the other. - In
strokeInanimating the line width by-1, and the scale of1/1.05sets up for the bounce animation. - The
bounceOutresets the line to its original dimensions.
The Logo
Now that we have our basic line, let’s put four of them together into a logo. First…
Create a new file called SlackLogo.swift
…and add the following class:
1
2
3
class SlackLogo: View{

}
Properties
Next, add a few Color variables:
1
2
3
4
let slackGreen = Color(red: 0.31, green: 0.76, blue: 0.61, alpha: 1.0)
let slackBlue = Color(red: 0.51, green: 0.80, blue: 0.85, alpha: 1.0)
let slackYellow = Color(red: 0.91, green: 0.70, blue: 0.21, alpha: 1.0)
let slackPink = Color(red: 0.87, green: 0.10, blue: 0.42, alpha: 1.0)
We eyedropped these using the Mac Color Picker… Don’t trust Sketch.
Next, add an array of points, we’ll use these to position each line:
1
var positions = [Point(53.0, 30.0),Point(76.0, 53.0),Point(53.0, 76.0),Point(30.0, 53.0)]
Finally, add an empty array to hold reference to the lines:
1
var slackLines = [SlackLine]()
Initialization
We’re now ready to create our logo. Add the following initializtion function:
1
2
3
4
5
6
7
8
9
10
11
12
13
14
15
16
17
18
19
20
21
22
override init() {
    super.init()
    frame = Rect(0,0,106,106)

    var colors = [slackGreen, slackBlue, slackYellow, slackPink]
    var smallSquareColors = [slackGreenOverlay, slackBlueOverlay, slackYellowOverlay, slackPinkOverlay]

    for i in 0...3 {
        let slackline = SlackLine()
        slackline.center = positions[i]
        slackline.strokeColor = colors[i]
        slackline.squareColor = smallSquareColors[i]

        let dir = i % 2 == 0 ? 1.0 : -1.0
        slackline.transform = Transform.makeRotation(dir * Double(i) * M_PI/2)

        slackLines.append(slackline)
        add(slackline)
    }

    rotation = -M_PI/10.0
}
This function is pretty straightforward, but it has two important points:
- The
slackline.transform = ..rotates each line so that it is oriented in the right way - The
rotation = -M_PI/10.0is applied to the view that contains all the lines, this accounts for the rotated look of the hash tag
Run It!
You’re at a point where you can see some good progress. So, pop on back over to WorkSpace and update its setup() to look like this:
1
2
3
4
5
override func setup() {
    let sl = SlackLogo()
    sl.center = canvas.center
    canvas.add(sl)
}
Now, run the application and you should see this:

Notice the green line overlays 2 other lines?! Unfortunately iOS doesn’t have real-time overlay effects… So, we’ll have to handle this in a bit with a nice trick.
Pause.
At this point your classes should look like:
Workspace.swift
1
2
3
4
5
6
7
class WorkSpace: CanvasController {
    override func setup() {
        let sl = SlackLogo()
        sl.center = canvas.center
        canvas.add(sl)
    }
}
SlackLogo.swift
1
2
3
4
5
6
7
8
9
10
11
12
13
14
15
16
17
18
19
20
21
22
23
24
25
26
27
28
29
30
31
class SlackLogo: View {
    let slackGreen = Color(red: 0.31, green: 0.76, blue: 0.61, alpha: 1.0)
    let slackBlue = Color(red: 0.51, green: 0.80, blue: 0.85, alpha: 1.0)
    let slackYellow = Color(red: 0.91, green: 0.70, blue: 0.21, alpha: 1.0)
    let slackPink = Color(red: 0.87, green: 0.10, blue: 0.42, alpha: 1.0)

    var positions = [Point(53.0, 30.0),Point(76.0, 53.0),Point(53.0, 76.0),Point(30.0, 53.0)]

    var slackLines = [SlackLine]()

    override init() {
        super.init()
        frame = Rect(0,0,106,106)

        var colors = [slackBlue, slackYellow, slackPink, slackGreen]

        for i in 0...3 {
            let slackline = SlackLine()
            slackline.center = positions[i]
            slackline.strokeColor = colors[i]

            let dir = i % 2 == 0 ? 1.0 : -1.0
            slackline.transform = Transform.makeRotation(dir * Double(i) * M_PI/2)

            slackLines.append(slackline)
            add(slackline)
        }

        rotation = -M_PI/10.0
    }
}
SlackLine.swift
1
2
3
4
5
6
7
8
9
10
11
12
13
14
15
16
17
18
19
20
21
22
23
24
25
26
27
28
29
30
31
32
33
34
35
36
37
38
39
40
41
42
43
44
45
46
47
48
class SlackLine: View {
    var line: Line!

    var strokeColor: Color = C4Blue {
        didSet {
            line.strokeColor = strokeColor
        }
    }

    override init() {
        super.init()
        self.frame = Rect(0,0,106,18.0)
        line = Line(Point(height/2.0,height/2.0),Point(width-height/2.0,height/2.0))
        line.lineWidth = height
        add(line)
    }

    func animate() {
        let strokeOut = ViewAnimation(duration: 0.25) {
            self.line.strokeEnd = 0.01
        }
        strokeOut.curve = .EaseOut
        strokeOut.delay = 0.1

        let shiftStroke = ViewAnimation(duration: 0.25) {
            self.line.strokeStart = 0.99
            self.line.strokeEnd = 1.0
        }
        shiftStroke.delay = 0.35
        shiftStroke.curve = .EaseIn

        let strokeIn = ViewAnimation(duration: 0.15) {
            self.line.lineWidth -= 1
            self.line.strokeStart = 0.05
            self.line.transform.scale(1/1.05, 1.0)
        }
        strokeIn.delay = 0.2

        let bounceOut = ViewAnimation(duration: 0.15) {
            self.line.transform.scale(1.05, 1.0)
            self.line.lineWidth += 1
            self.line.strokeStart = 0.0
        }

        let seq = ViewAnimationSequence(animations: [strokeOut, shiftStroke, strokeIn, bounceOut])
        seq.animate()
    }
}
Animating the Logo
Let’s get this logo rotating and doing all the nice things. Back in SlackLogo.swift, add the following function:
1
2
3
4
5
6
7
8
9
func animate() {
    ViewAnimation(duration:0.85) {
        self.rotation += M_PI * 2
    }.animate()

    for line in slackLines {
        line.animate()
    }
}
The animation of the logo is simple, it spins. Your line animations are already setup you just need to call their animate function. So, when animate() is called we simply need to fire off all the line animations.
Tap It.
Add a tap gesture to the setup() in your WorkSpace:
1
2
3
4
5
6
7
8
9
10
11
12
13
14
15
16
override func setup() {
    let lines = SlackLogo()
    let squares = SlackLogo()
    squares.isSquares = true

    lines.center = canvas.center
    canvas.add(lines)

    squares.center = canvas.center
    canvas.add(squares)

    canvas.addTapGestureRecognizer { (locations, center, state) -> () in
        lines.animate()
        squares.animate()
    }
}
Run it!
Wham. Lookit that:
Handling the Overlays
One drawback of iOS is that it’s Core Animation framework doesn’t handle real-time layer effects. Yeah, it’s possible to create layer effects between images using filters, but animated layers aren’t important enough to warrant such nice things.
So, we have to be sneaky…
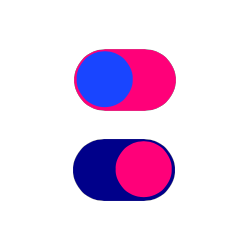
Overlays are Just Visual Effects
If you look closely at the motion of the Slack logo you’ll notice that as each line is animating in or out and gets to the point where it crosses another line, you can see the overlay color take the shape of the lines round cap. With a deeper look at some examples of the logo that have been posted online it’s pretty clear that someone, somewhere, at some point probably used an overlay effect… like this:
1
2
3
4
.c-slack__dot {
  /* other styles */
  mix-blend-mode: multiply;
}
My guess is that the original logo was designed in After Effects
Since iOS doesn’t have a multiply effect for layers, we’re going to to have to simulate the effect. This is going to require:
- instantaneous animations (timed perfectly with the other
SlackLineanimations) - overlay shapes
- masks
Another thing to note is that at first glance we probably want the lines in the current logo to be the shapes that do the masking… We already have 4 lines, so why not use them?
Right?…
Wrong!
Since we already have the lines positioned and timed for the SlackLogo, why don’t we just approriate them?
Here’s what I mean…
Modify SlackLogo
We’re going to add some overlay squares to our current logo (actually to each line), with the proper color to look like the multiply effect between two lines. Then, we’re going to the use the existing line shape as the mask.
You say:
"Buuuuuut...... Waaaaaait a minute. How can we see a shape if it is being used as a mask?"
I say:
You can't. But, you can use 2 different SlackLogo objects.
Modify SlackLine
Pop on over to SlackLine.swift and add the following variables to the class:
1
2
3
4
5
6
7
8
9
10
11
12
13
var square: Rectangle!
var squareMask: Line!
var isSquares = false {
    didSet {
        line.hidden = isSquares
        square.hidden = !isSquares
    }
}
var squareColor: Color = C4Pink {
    didSet {
        square.fillColor = squareColor
    }
}
Essentially, we’ve created two states for the
SlackLine, one where the main lines are visible and another where the overlay square is visible.
Next, we need to create the overlay square and its mask and add them to the line object. After in setup after the call to add(line), add the following code:
1
2
3
4
5
6
7
8
9
10
11
12
13
14
15
16
17
18
let squareCenterOffset = width - 30.0
square = Rectangle(frame: Rect(squareCenterOffset-height/2.0,0,height,height))
let maskXOffset = square.origin.x - line.points[0].x
squareMask = Line(Point(-maskXOffset,height/2.0),Point(line.points[1].x-line.points[0].x-maskXOffset,height/2.0))

square.corner = Size()
square.lineWidth = 0
square.hidden = true
add(square)

squareMask.lineWidth = height
square.mask = squareMask

var anchor = square.center
anchor.x += height * 0.26
anchor.x /= width
anchor.y = 0.5
squareMask.anchorPoint = anchor
The need for offsets and anchor points is because a mask object is positined in the coordinate space of the object to which it is being applied. To align a mask inside a square with the normal lines, we need to offset it start and end points relative to the square’s position compared to the line.
Furthermore, we want the mask to rotate around the center of the square, hence the need for the anchor point.
Run It.
Temporarily change square.hidden = true to false and run the app to see this:

Looks like there’s only one square, right?
WRONG!
Tap it!
All the squares are there, they’re just hidden by the overlaid lines.
Animate the Masks
The next step is really a bunch of tiny little steps woven into our already existing code for animating the SlackLine. Instead of walking through it all, you can replace the current animate() with the following:
1
2
3
4
5
6
7
8
9
10
11
12
13
14
15
16
17
18
19
20
21
22
23
24
25
26
27
28
29
30
31
32
33
34
35
36
37
38
39
40
41
42
43
44
45
46
func animate() {
    let strokeOut = ViewAnimation(duration: 0.25) {
        self.line.strokeEnd = 0.01
        self.squareMask.strokeEnd = 0.01
    }
    strokeOut.curve = .EaseOut
    strokeOut.delay = 0.1

    let rotateMask = ViewAnimation(duration: 0) {
        self.square.hidden = true
        self.squareMask.transform = Transform.makeRotation(M_PI/2)
    }

    let shiftStroke = ViewAnimation(duration: 0.25) {
        self.line.strokeStart = 0.99
        self.line.strokeEnd = 1.0
    }
    shiftStroke.delay = 0.35
    shiftStroke.curve = .EaseIn

    let revealSquare = ViewAnimation(duration: 0) {
        self.square.hidden = false
    }

    let strokeIn = ViewAnimation(duration: 0.15) {
        self.line.lineWidth -= 1
        self.line.strokeStart = 0.05
        self.squareMask.strokeEnd = 0.95
        self.line.transform.scale(1/1.05, 1.0)
    }
    strokeIn.delay = 0.2

    let bounceOut = ViewAnimation(duration: 0.15) {
        self.line.transform.scale(1.05, 1.0)
        self.line.lineWidth += 1
        self.line.strokeStart = 0.0
        self.squareMask.strokeEnd = 1.0
    }

    let revertMaskRotation = ViewAnimation(duration: 0) {
        self.squareMask.transform = Transform()
    }

    let seq = ViewAnimationSequence(animations: [strokeOut, rotateMask, shiftStroke, revealSquare, strokeIn, bounceOut, revertMaskRotation])
    seq.animate()
}
Here’s what happens with the masking animations:
I had to tweak a few things to get this appearance. Don’t worry about doing it yourself, just trust me! Everything’s going to be just fine.
Give the Logo a Little Toggle
In SlackLogo add the following property:
1
2
3
4
5
6
7
var isSquares = false {
    didSet {
        for slackline in self.slackLines {
            slackline.isSquares = isSquares
        }
    }
}
Toggling this value will switch a logo from showing its main lines to showing only its overlay squares.
Add a Dash of Color
Now, add these color properties to SlackLogo:
1
2
3
4
var slackGreenOverlay = Color(red: 0.18, green: 0.62, blue: 0.53, alpha: 1.0)
var slackBlueOverlay = Color(red: 0.47, green: 0.58, blue: 0.16, alpha: 1.0)
var slackYellowOverlay = Color(red: 0.81, green: 0.05, blue: 0.11, alpha: 1.0)
var slackPinkOverlay = Color(red: 0.24, green: 0.03, blue: 0.24, alpha: 1.0)
Then, replace init() with:
1
2
3
4
5
6
7
8
9
10
11
12
13
14
15
16
17
18
19
20
21
22
override init() {
    super.init()
    frame = Rect(0,0,106,106)

    var colors = [slackBlue, slackYellow, slackPink, slackGreen]
    var smallSquareColors = [slackBlueOverlay, slackYellowOverlay, slackPinkOverlay, slackGreenOverlay]

    for i in 0...3 {
        let slackline = SlackLine()
        slackline.center = positions[i]
        slackline.strokeColor = colors[i]
        slackline.squareColor = smallSquareColors[i]

        let dir = i % 2 == 0 ? 1.0 : -1.0
        slackline.transform = Transform.makeRotation(dir * Double(i) * M_PI/2)

        slackLines.append(slackline)
        add(slackline)
    }

    rotation = -M_PI/10.0
}
This step gives each line’s overlay the proper color.
Add Another Logo
To see the overlays, simply add another logo on top of the one we already have. In the main WorkSpace modify the setup() to look like this:
1
2
3
4
5
6
7
8
9
10
11
12
13
14
15
16
override func setup() {
    let lines = SlackLogo()
    let squares = SlackLogo()
    squares.isSquares = true

    lines.center = canvas.center
    canvas.add(lines)

    squares.center = canvas.center
    canvas.add(squares)

    canvas.addTapGestureRecognizer { (locations, center, state) -> () in
        lines.animate()
        squares.animate()
    }
}
Now your canvas will have all the lines and squares on it and when you tap it the animation will happen. And, this is what you get:
Try running the app and trying for yourself!
That was a long one…
Honestly, when we started we thought this example would be straightforward. In the end we realized how intricate the motion of the Slack logo really is.
Code
You can grab a copy of the code for this project from HERE