Bees & Bombs
Rebuilding a gif from Bees & Bombs
Tutorials>Hacking UISwitch
Hacking UISwitch
For our Switch tutorial Ollie and I had put together a WorkSpace that had a lot of animation code, and I wasn’t very happy about that. I wanted to have a tighter version of the switch example and wanted it also to run efficiently. I decided to see if it were possible to hack an actual UIKit element and put some C4 code right into it. It worked.
This tutorial goes through my process of creating the Switch class.
Decomopsing A UIKit Object
To hack UISwitch I need to first know how its constructed. I know that a switch is a subclass of UIControl, which means that I can treat it like a basic view. I also know that all views contain subviews, so to figure out the switch structure I need to print out the view hierarchy.
I write a little script that would print out the view hierarchy of the object. The script looks like this:
1
2
3
4
5
6
7
8
9
10
11
12
13
14
15
override func setup() {
        let myswitch = UISwitch()
        listSubviews(myswitch)
}

func listSubviews(view: UIView, tabs: Int = 0) {
    for subview in view.subviews {
        var tab = ""
        for _ in 0..<tabs {
            tab += "\t"
        }
        print(tab + " \(subview)")
        listSubviews(subview, tabs: tabs+1)
    }
}
The listSubviews method takes a view and prints out its subviews, taking both the view and the current level as input. I use the tabs variable to format the printed statements in the console. After printing each view I run listSubviews on it (recursion).
Running the script from a C4 project, I get the following output in the Xcode console:
1
2
3
4
5
6
7
8
9
 <_UISwitchInternalViewNeueStyle1: 0x7fcbc2d0da30; frame = (0 0; 51 31); gestureRecognizers = <NSArray: 0x7fcbc2d1c110>; layer = <CALayer: 0x7fcbc2d0de90>>
   <UIView: 0x7fcbc2d0e700; frame = (15.5 0; 35.5 31); clipsToBounds = YES; layer = <CALayer: 0x7fcbc2d0e870>>
     <UIView: 0x7fcbc2d0e1d0; frame = (-15.5 0; 51 31); layer = <CALayer: 0x7fcbc2d0e340>>
   <UIView: 0x7fcbc2d0e570; frame = (0 0; 15.5 31); clipsToBounds = YES; layer = <CALayer: 0x7fcbc2d0e6e0>>
     <UIView: 0x7fcbc2d0e360; frame = (0 0; 51 31); layer = <CALayer: 0x7fcbc2d0e4d0>>
   <UIView: 0x7fcbc2d1d5d0; frame = (0 0; 51 31); layer = <CALayer: 0x7fcbc2d1d210>>
     <UIImageView: 0x7fcbc2d1cb70; frame = (39 16; 0 0); userInteractionEnabled = NO; tintColor = UIDeviceWhiteColorSpace 0.7 1; layer = <CALayer: 0x7fcbc2d1b970>>
     <UIImageView: 0x7fcbc2d1d420; frame = (12 16; 0 0); alpha = 0; userInteractionEnabled = NO; tintColor = UIDeviceWhiteColorSpace 1 1; layer = <CALayer: 0x7fcbc2d1d3f0>>
   <UIImageView: 0x7fcbc2d0ef30; frame = (-13 -6; 57 43.5); opaque = NO; userInteractionEnabled = NO; layer = <CALayer: 0x7fcbc2d1c090>>
Nasty, but not too nasty. To me I read this output as:
1
2
3
4
5
6
7
8
9
10
Switch
  Internal View
    View
      View
    View
      View
    View
      Image
      Image
    Image
Rather, there are basically 4 main subviews for me to explore. The top-level “internal” view has the gesture recognizer on it. The remaining layer have userInteractionEnabled = NO, implying that they are all used for the appearance of the switch.
Next, I want to “see” the structure of each of the subviews.
Looking at the Subviews
I want to toggle each subview on / off to actually see how they contribute to the look of the switch. To do this I write a simple function that gives me the ability to toggle:
1
2
3
4
5
6
7
8
9
10
11
12
13
14
15
override func setup() {
    let myswitch = UISwitch()
    myswitch.center = CGPoint(canvas.center)
    canvas.add(myswitch)
    toggleSubviews(myswitch)
}

internal func toggleSubviews(uiswitch: UISwitch) {
    let subviews = uiswitch.subviews
    let mainView = subviews[0]
    let subview = mainView.subviews[0] // remember there are 4!
    canvas.addTapGestureRecognizer { (location, state) -> () in
        subview.hidden = !subview.hidden
    }
}
Now when I tap I can see the right-hand side of the background “pill” disappearing and reappearing.
//NEED IMAGE GIF HERE
I go through each of the other subviews to get a sense of the visual construction…
The following makes the left-hand side of the pill toggle.
1
let subview = mainView.subviews[1]
The following doesn’t seem to do anything:
1
let subview = mainView.subviews[2]
In the docs for
UISwitchI notice that there areonImageandoffImageproperties, both of which have the following statement: “In iOS 7, this property has no effect.” So, I surmisesubviews[2]probably has something to do with that…
The following makes the thumbnail toggle:
1
let subview = mainView.subviews[3]
From these tests I get the sense that I’m going to need to do the following:
- Strip subviews 0, 1, and 2 from the switch
- Replace the image in subview 3 with my own custom thumb view
- Add my own custom background view to the main subview
- Both the thumb and the background should be their own classes
The Thumbnail
I start by creating a thumbnail class called SwitchThumbnail. It looks like this:
1
2
3
4
5
6
7
8
9
10
11
12
13
14
15
16
17
18
19
20
21
22
23
24
25
26
27
28
29
@IBDesignable
public class SwitchThumb: Circle {
convenience public init() {
self.init(center: Point(14, 14), radius: 14)
lineWidth = 0
setup()
}
func setup() {
}
func toggle(force: Bool) {
ViewAnimation(duration: 0.25) {
if force {
self.on()
} else {
self.off()
}
}.animate()
}
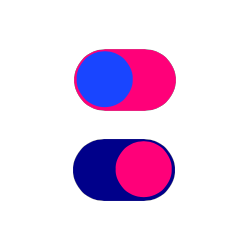
func on() {
self.fillColor = C4Pink
}
func off() {
self.fillColor = C4Blue
}
}
Since the thumbnail should always be the same size, I make sure there’s an init() that takes no variables. I also override the main init(center...) method so that it forces the creation of a standard sized shape. In this init I also call setup() (to be consistent with C4) and set the lineWidth to 0.
I then create 2 methods called off and on and give them some rules. I do this because I’m already thinking of how people might subclass SwitchThumb. I want it to be easy to change the look / feel of the thumb by having people override these two methods.
Finally, I create the toggle method that triggers an animation and calls either on or off depending on the state of the switch.
The Background
I create a second class for the background of the switch. The structure of this class is very similar to that of the thumbnail. The class looks like this:
1
2
3
4
5
6
7
8
9
10
11
12
13
14
15
16
17
18
19
20
21
22
23
24
25
26
27
28
29
30
31
32
33
34
35
36
37
38
39
@IBDesignable
public class SwitchBackground: View {
    public override init() {
        super.init()
        self.frame = Rect(UISwitch().frame)
        applyMask()
        setup()
    }

    internal func applyMask() {
        let backgroundMask = Rectangle(frame: self.bounds)
        backgroundMask.lineWidth = 0
        backgroundMask.corner = Size(height/2, height/2)
        self.mask = backgroundMask

        self.backgroundColor = C4Pink
    }

    func setup() {
    }

    func toggle(force: Bool) {
        ViewAnimation(duration: 0.25) {
            if force {
                self.on()
            } else {
                self.off()
            }
            }.animate()
    }

    func on() {
        self.backgroundColor = C4Purple
    }

    func off() {
        self.backgroundColor = C4Pink
    }
}
The major difference here is that there is an applyMask method whose sole function is to mask the background into a pill-shape. Also, notice how I force the size of the background to be the same size as that of a standard UISwitch.
The Switch
This is where we’re going to subclass UISwitch. We will get rid of all the unnecessary views and substitute our own custom background and thumbnail. This is what the class looks like:
1
2
3
4
5
6
7
8
9
10
11
12
13
14
15
16
17
18
19
20
21
22
23
24
25
26
27
28
29
30
31
32
33
34
35
36
37
38
39
40
41
42
43
44
45
46
47
48
49
50
51
52
53
54
55
56
57
58
59
60
61
62
@IBDesignable
class Switch: UISwitch {
    var thumb: SwitchThumb?
    var background: SwitchBackground?

    required init?(coder: NSCoder) {
        super.init(coder: coder)
        thumb = SwitchThumb()
        background = SwitchBackground()
        replaceViews()
        setup()
        toggle()
    }

    override init(frame: CGRect) {
        super.init(frame: frame)
        thumb = SwitchThumb()
        background = SwitchBackground()
        replaceViews()
        setup()
        toggle()
    }

    init(thumb aThumb: SwitchThumb? = SwitchThumb(), background aBackground: SwitchBackground? = SwitchBackground()) {
        super.init(frame: CGRect())

        thumb = aThumb
        background = aBackground
        replaceViews()
        setup()
    }

    internal func replaceViews() {
        let subviews = self.subviews
        let mainView = subviews[0]
        let imageView = subviews[0].subviews[3] as! UIImageView
        thumb?.center = Point(Double(imageView.bounds.size.width-28.66666), Double(imageView.bounds.midY-0.66666))
        imageView.addSubview(thumb!.view)
        imageView.image = UIImage()

        self.addTarget(self, action: "toggle", forControlEvents: UIControlEvents.ValueChanged)

        mainView.add(background)
        mainView.bringToFront(imageView)

        let sv0 = mainView.subviews[0]
        let sv1 = mainView.subviews[1]
        let sv2 = mainView.subviews[2]

        mainView.remove(sv0)
        mainView.remove(sv1)
        mainView.remove(sv2)
    }

    func setup() {
    }

    func toggle() {
        self.thumb?.toggle(on)
        self.background?.toggle(on)
    }
}
The inits
There are 3 initializers in this class:
- init?(coder:)
- init(frame:)
- init(thumb:, background:)
The first init is required to be compatible with UIKit, it gets called when a view is initialized from Interface Builder. The second initializer can be used when constructing a switch from code and not IB. The third initializer is a convenience for quickly creating a switch by passing two objects: a thumb and a background.
Replacing Views
This method strips the first three subviews of the standard object, and adds our custom views as well as a target / action. First, it adds our custom thumb object to the topmost image view:
1
2
3
4
5
6
let subviews = self.subviews
let mainView = subviews[0]
let imageView = subviews[0].subviews[3] as! UIImageView
thumb?.center = Point(Double(imageView.bounds.size.width-28.66666), Double(imageView.bounds.midY-0.66666))
imageView.addSubview(thumb!.view)
imageView.image = UIImage()
In doing so, it also centers the thumb based on the position of the image view. I manually calculate the 28.66666… so that our view fit nicely over top of the original image. Once the thumb is centered, it eliminates the underlying image by providing the image view with null contents (i.e. UIImage()).
The next step adds a target-action to the switch so that it runs the toggle method when activiated.
Then, it adds the background to the main view, and makes sure the main image view (i.e. subview[3]) remains on top:
1
2
mainView.add(background)
mainView.bringToFront(imageView)
Finally, the unnecessary views are stripped from the object:
1
2
3
4
5
6
7
let sv0 = mainView.subviews[0]
let sv1 = mainView.subviews[1]
let sv2 = mainView.subviews[2]

mainView.remove(sv0)
mainView.remove(sv1)
mainView.remove(sv2)
Toggling
The last part of the switch class links the toggle method with the underlying thumb and background objects:
1
2
3
4
func toggle() {
    self.thumb?.toggle(on)
    self.background?.toggle(on)
}
Using the Switch
You can use the switch in two different ways, either create it yourself or position it with Interface Builder.
Do It Yourself
Here’s how you can construct a switch on your own:
1
2
3
4
5
6
7
class WorkSpace: CanvasController {
    override func setup() {
        let s = Switch(thumb: SwitchThumb(), background: SwitchBackground())
        s.center = CGPoint(canvas.center)
        canvas.add(s)
    }
}

Interface Build It
Using Interface Builder, you drag a regular UISwitch onto your main storyboard, and then change the object class to Switch.

Wrapping Up
This tutorial walked through my process for figuring out the structure of a standard UIKit component, the UISwitch. It also showed how to build a new subclass so that it is fairly easy for someone else to use. You can learn how to build a custom subclass of Switch our other tutorial.
We are thinking about how to best integrate UIKit elements into C4, but for now Switch is an experiment. If you want to use it you can grab the 3 files from HERE, and drop them into your C4 project.